



Naimh is a seasoned marketer of 12 years, including in SaaS and tech. She’s an expert at simplifying complex technology concepts, bridging the gap between IT and marketing. Naimh specializes in turning tech speak into actionable insights, helping marketers get the most out of their tools and technology.
How to run marketing campaigns using email signatures in Exclaimer
TL;DR
Email signature campaigns turn everyday emails into a scalable marketing channel with banners that promote content, events, or offers
A strong setup includes a clear goal, targeted audience, simple banner, and defined timeframe to keep campaigns focused and relevant
Centralized management keeps campaigns consistent and reduces manual work, especially across large teams and multiple devices
Exclaimer makes this easier to run at scale, with centralized control, built-in targeting, and scheduling designed for email signature campaigns
Email signature banners that link to US-facing sites fall under ADA Title III accessibility expectations — WCAG 2.1 Level AA is the operating baseline
Exclaimer supports A/B testing of banner variants by splitting recipients across two groups for a fixed window, then comparing click-through rates
Email signature marketing is the practice of using employee email signatures as a marketing channel by embedding promotional banners, CTAs, and trackable links to drive awareness, clicks, and conversions through everyday business emails. |
Email signatures are often overlooked as a marketing channel. But each employee email is a high-visibility touchpoint. With Exclaimer, you can turn those everyday emails into targeted campaign placements without adding manual work.
This guide walks through how to plan, set up, and manage email signature marketing campaigns in Exclaimer, so you can run campaigns that are visible, controlled, and easy to update.
Quick answer
Define one measurable goal — for example, "generate 100 webinar registrations in 30 days."
Create a banner with a single CTA and add it to the Campaigns feature in Exclaimer.
Assign the campaign to relevant sender groups using Signature Rules.
Add a UTM-tagged destination URL to attribute clicks and conversions.
Set start and end dates, test across email clients, then deploy and monitor CTR in Google Analytics or your CRM.
What is an email signature marketing campaign?
An email signature marketing campaign is a banner-based promotion added to employee email signatures to drive awareness, clicks, or conversions.
 It runs automatically across everyday emails, turning one-to-one communication into a scalable marketing channel.
This typically includes:
A visual banner placed within the signature
A clickable link to a landing page
Targeted delivery based on user or audience rules
Unlike traditional email marketing, these campaigns run continuously across one-to-one emails. Every message becomes a distribution point.
Email signature campaigns vs. email signature management
While related, these are distinct concepts: Email signature campaigns focus on time-bound promotional banners designed to drive specific marketing outcomes like event registrations or product launches. Email signature management refers to the broader practice of centrally controlling signature design, branding, and compliance across an organization. Campaigns are a marketing use case that runs on top of a signature management platform.
Why use email signatures for marketing campaigns?
Email signature campaigns work because they combine high visibility, low cost, and trusted communication.
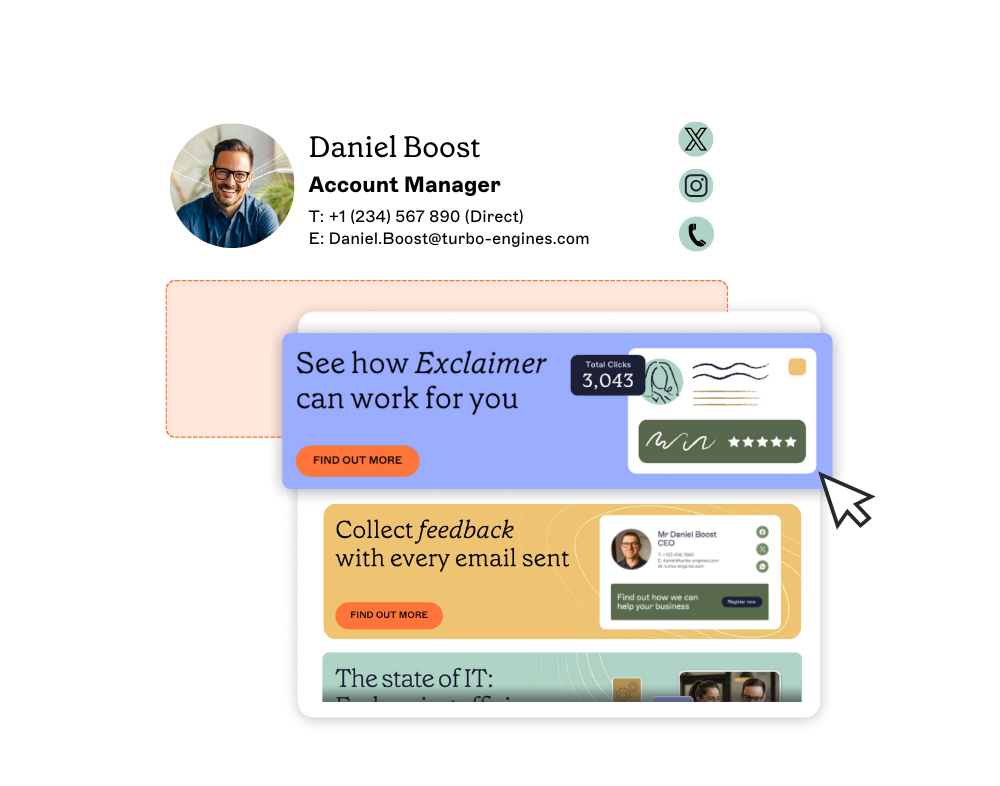 They appear in emails that recipients already expect and engage with, increasing the likelihood of interaction.
Key statistics |
- 40 emails daily – Average emails sent per employee (Microsoft, 2025) |
- 408.2 billion daily by 2027 – Projected business email volume (Statista) |
- ~4% CTR – Email signature campaign click-through rate (Exclaimer) |
- 90%+ open rates – Embedded in emails already being read |
The benefits of this approach include:
Built-in reach across everyday emails – Employees send large volumes of emails daily, and each one becomes an opportunity to display campaign messaging without additional sends.
A low-cost, high-frequency marketing channel – There's no media spend or send cost, as campaigns run in the background attached to emails already being sent.
Trusted, one-to-one communication context – Recipients are usually already engaged with the sender, making the message more likely to be seen and acted on compared to mass campaigns.
Higher engagement rates – Email signature campaigns can achieve click-through rates of around 4%, compared to 2.5% for traditional mass email marketing.
Email signature campaigns vs. traditional email marketing
Factor | Email signature campaigns | Traditional email marketing | Source / note |
|---|---|---|---|
Cost per click | Free (no media spend) | Paid | Editorial |
Open rates | 90%+ (embedded in read emails) | ~21% average | Litmus, 2025 State of Email Engagement for traditional; 90%+ business email open rate requires a named primary source (see key statistics note) |
CTR | ~4% | ~2.5% | Exclaimer for signature CTR; Litmus, 2025 State of Email Engagement for traditional |
Trust signal | One-to-one communication | Broadcast messaging | Editorial |
Management | Centralized, automated | List-based, scheduled sends | Editorial |
Frequency | Continuous | Campaign-based | Editorial |
Best for | Ongoing brand awareness, event promotion, always-on campaigns running alongside daily communication | One-off announcements, newsletters, nurture sequences with specific send schedules | Editorial |
What you need before starting
Before setting up your first email signature campaign, ensure you have the following prerequisites:

An Exclaimer account with campaign access
Banner assets (JPG, PNG, or GIF, max 150KB, up to 600 x 600 pixels)
UTM tracking setup for measuring campaign performance
Target audience segments defined (departments, roles, or locations)
Clear campaign goals and success metrics
"Email signature campaigns sit inside emails recipients are already reading. The engagement rate advantage over broadcast email makes sense as the recipient is already in the conversation, not filtering an inbox."

What you need before starting
Before setting up your first email signature campaign, confirm these five requirements:
Platform access — An Exclaimer account with permission to use Campaigns and edit signature assets.
Banner asset — JPG, PNG, or GIF; maximum 150 kB; recommended dimensions up to 600 × 600 px; descriptive alt text prepared.
Tracked URL — Destination URL with UTM parameters appended. Example:
https://example.com/webinar?utm_source=email_signature&utm_medium=email&utm_campaign=webinar_q3_2026Audience segment — Sender groups defined: for example, Sales, Customer Success, EMEA Sales, or Enterprise Account Managers.
Success metric — Primary KPI set before launch: clicks, CTR, demo bookings, webinar registrations, content downloads, or pipeline influenced.
How to plan your email signature campaign
Planning an email signature campaign involves defining your goal, audience, message, and timing before setup begins. This helps you avoid rework and improves campaign performance.
Build a one-page campaign brief before setting anything up in Exclaimer. This keeps goal, audience, CTA, tracking, and timing aligned before you touch the product.
Field | Example |
|---|---|
Campaign goal | Generate 75 demo requests in Q3 |
Primary KPI | Demo form submissions from signature traffic |
Target audience | External recipients emailed by Sales and Customer Success |
Sender segment | Sales, Customer Success, and Account Management teams |
CTA | "Book a demo" |
Destination | Dedicated demo landing page |
Tracking |
|
Campaign window | July 1–August 31, 2026 |
Reporting cadence | Weekly for first four weeks, then monthly |
Adjust the fields for your campaign type. An event-registration campaign uses "Register now" as the CTA and a webinar page as the destination. A product launch targets a launch landing page and measures trial sign-ups or form completions.
Align timing with your campaign
Email signature campaigns work best when they're time-bound. The right run window depends on the campaign type.
Campaign type | Recommended window | Example |
|---|---|---|
Event or webinar registration | Two to six weeks before event | Run until 24 hours pre-event, then swap the banner |
Product launch | Two to four weeks | Start on launch day; run through the initial awareness window |
Flash promotion | 24 to 72 hours | Use for time-limited offers with a hard end date |
Seasonal campaign | Two to four weeks | Run during the relevant buying period |
Evergreen content | Four to eight weeks before creative refresh | Promote a guide, report, or demo page, then rotate |
Seasonal campaigns follow the same logic: set a hard end date and swap the banner as soon as the moment passes.
Quick summary: Campaign setup steps |
|
Step-by-step: How to set up a marketing banner campaign in Exclaimer
To set up a marketing banner campaign in Exclaimer, you create a campaign, upload a banner, define timing, and apply rules to control who sees it.
“Marketers can design banners or templates directly in the platform, with no HTML and no IT tickets. Campaign scheduling makes it easy to plan seasonal promotions or event tie-ins on the fly, all within the brand guardrails, and campaigns deploy automatically across your groups in a couple of minutes. It bridges the gap between creative and control, marketing moves faster while IT keeps oversight.”

Step 1: Access the Campaigns feature
Log in to Exclaimer and select Campaigns from the sidebar.
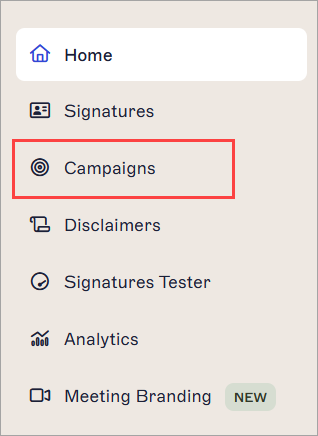
This opens the Campaigns dashboard, where all active and scheduled campaigns are managed.
Step 2: Create a new campaign
Select Create Campaign to open the campaign setup screen.
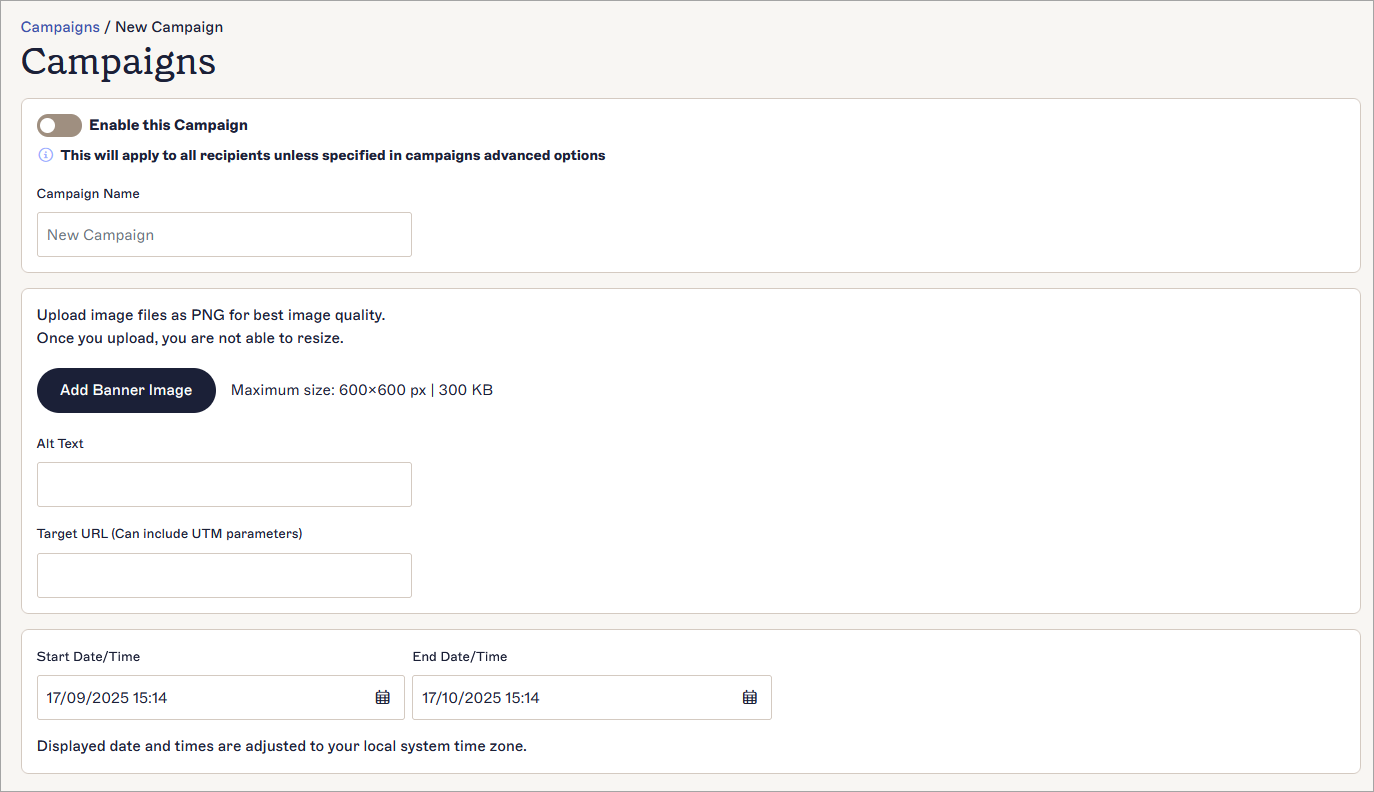
Enter a Campaign Name and select the Enable this Campaign toggle to set the campaign as Enabled.
Step 3: Upload your banner image
Select Add Banner Image and upload your campaign asset.
Keep in mind:
Supported formats: JPG, PNG, GIF
Max size: 150KB
Recommended dimensions: up to 600 x 600 pixels
Add Alt Text to improve accessibility and fallback display.
Step 4: Add your campaign link
Enter your destination URL in the Target URL field. Generally, you’ll want to link to a landing page, event, or offer.
Add UTM parameters to your link to measure campaign engagement and ROI. Use consistent naming across campaigns so results are comparable in Google Analytics or your CRM.
utm_source=email_signature utm_medium=email utm_campaign=webinar_q3_2026 utm_content=sales_banner_a |
Full example:
https://example.com/webinar?utm_source=email_signature&utm_medium=email&utm_campaign=webinar_q3_2026&utm_content=sales_banner_a
Step 5: Set campaign timing
Define when your campaign should run:
Start date and time
End date and time
Example: Start July 1, 2026 at 9:00 a.m. EDT; end July 31, 2026 at 11:59 p.m. EDT.
Campaigns are designed for time-bound promotions, so this step is essential. Set a firm end date, as leaving a campaign running indefinitely means outdated promotions keep reaching recipients long after the offer has passed.
Step 6: Save and enable the campaign
Save your campaign to make it available in your Campaigns dashboard.
 At this point, the campaign is created but not yet fully applied.
Step 7: Apply campaign rules
Select Manage to configure how the campaign is applied and targeted.
 This includes:
Defining which users or groups the campaign applies to
Controlling when and where it appears
If multiple campaigns are active with overlapping date ranges, Exclaimer applies the first matching campaign only. Review your scheduled campaigns before saving to avoid unintended gaps.
Tip
Campaigns aren't supported for Gmail client-side deployment. Server-side deployment is required for campaign banners to appear in Gmail. Check your deployment method in Exclaimer settings before going live.
Step 8: Test across devices and email clients
Before rollout, use the Signatures Tester to preview how the campaign appears.
Test in these environments before going live:
Outlook desktop (Windows and macOS)
Outlook on the web
Gmail (web)
Apple Mail
iOS Mail
Android mail clients
Verify that:
The banner image loads correctly over HTTPS
The CTA link opens the correct destination page
UTM parameters remain intact after clicking
The banner is not clipped on mobile
The signature appears in the correct position on new emails, replies, and forwards
Legal disclaimers, brand colors, and logos are intact
Step 9: Deploy and monitor
Once active, the campaign is automatically appended to emails after the signature.
Monitor performance in Google Analytics, your CRM, or a link-tracking platform using the UTM-tagged URL set in Step 4.
Metric | What it measures |
|---|---|
Clicks | Total clicks on the banner or CTA |
CTR | Clicks divided by tracked signature impressions or delivered emails |
Conversion rate | Landing-page conversions divided by signature-driven sessions |
Pipeline influence | Opportunities or closed-won revenue associated with signature campaign traffic |
Update or replace campaigns as performance data accumulates. Replace creative every three to six weeks, or sooner if CTR drops materially from your opening baseline.
“One-to-one emails are a high-frequency channel you completely own, so the costs aren't as high as the paid channels everyone's fighting over. Each of those emails is otherwise a missed impression, a missed click, a missed chance to connect. That's what the signature space represents.”
ADA compliance for scheduled email signature campaigns
Email signature banners that link to a US-facing website fall under the same ADA Title III accessibility expectations as the site itself. WCAG 2.1 Level AA is the operating baseline. Section 508 (applied in US federal procurement) references WCAG 2.0 AA; meeting WCAG 2.1 AA satisfies both.
Run these five checks on every banner before it goes live.
Check | WCAG 2.1 success criterion | How to verify in Exclaimer |
|---|---|---|
Add alt text to every banner image | 1.1.1 Non-text Content | Enter descriptive alt text in the Add Banner Image upload field. Example: "Sponsoring the 2026 [Industry] Awards — book your seat" |
Meet colour contrast minimums | 1.4.3 Contrast Minimum | 4.5:1 ratio for normal text; 3:1 for large text (18pt+ or 14pt bold). Use a colour contrast checker against your banner background before uploading |
Don't convey information by colour alone | 1.4.1 Use of Colour | CTAs and buttons must use text, icon, or underline — not colour alone — to signal meaning |
Size click areas to at least 24 × 24 CSS pixels | 2.5.8 Target Size — Minimum | Banner links generally exceed this threshold. Confirm for small inline CTA elements |
Write copy that makes sense without surrounding context | 2.4.4 Link Purpose | The destination must be clear from the banner text or alt text alone. "Click here" fails. "Register for the 2026 Partner Summit" passes |
For US federal-adjacent buyers, Section 508 alignment is covered by meeting WCAG 2.1 Level AA.
For more information, read our guide to ADA, WCAG, and Section 508 compliance for email signatures
A/B testing email signature banners in Exclaimer
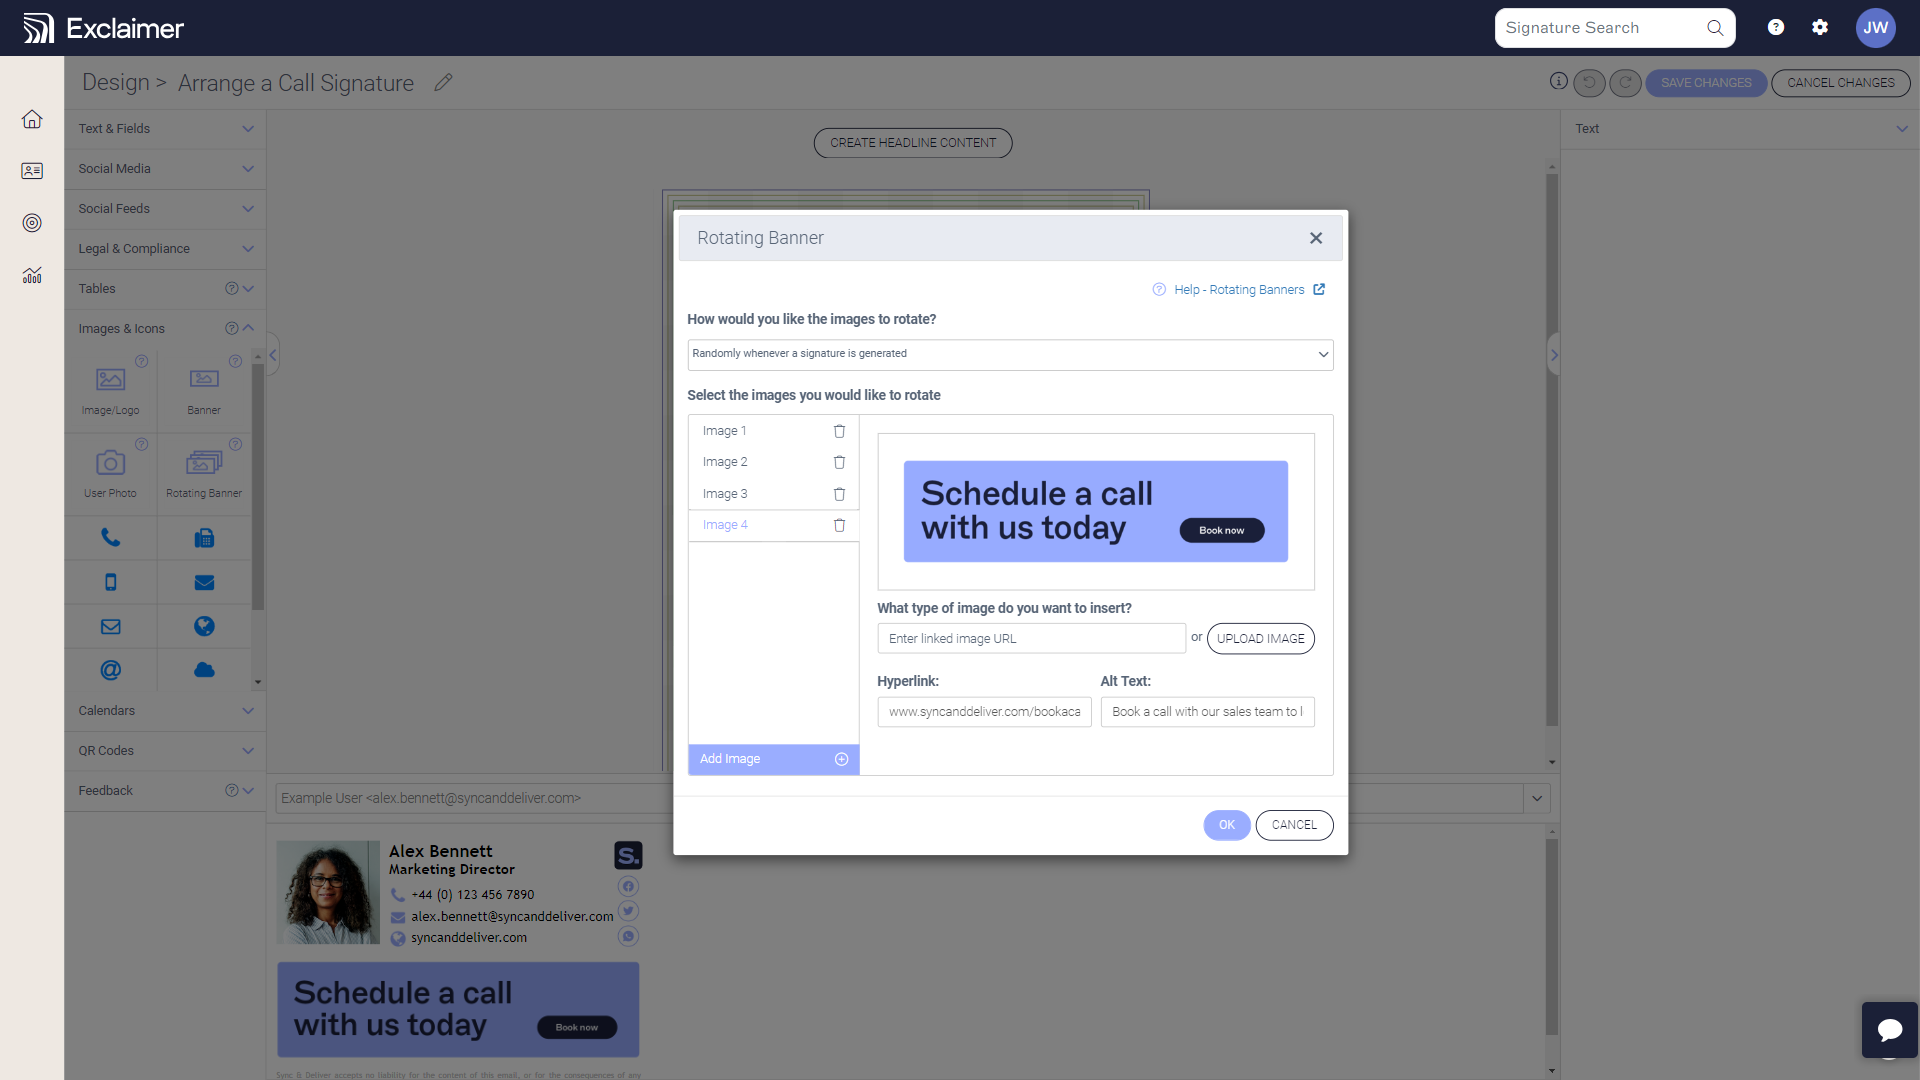
Exclaimer supports A/B testing of email signature banners by splitting recipients across two variants for a fixed window, then comparing click-through rates.
To run a valid test:
Define the single variable under test. Test one thing at a time: creative, copy, CTA wording, or destination URL. Testing multiple variables simultaneously makes results uninterpretable.
Set up your split. Use random banner rotation across all users, or split by Microsoft Entra ID or Google Workspace directory group for cleaner separation. Group-based splits are easier to analyze.
Set a run window of at least two full working weeks. Shorter windows skew results toward day-of-week patterns. Two weeks captures the natural variation in email cadence across your sender population.
Calculate your minimum sample size before you start. Use the lookup table below. If you won't reach the minimum sends per variant within your window, extend the window before the test begins.
Read the results correctly. Compare CTR per variant: click count divided by tracked sends per variant. Exclude clicks from Apple Mail Privacy Protection (MPP), Mimecast, and Proofpoint — these are automated bot clicks, not human engagement. Count only sends where delivery of the banner was confirmed.
“Measurement has been the missing piece in signature marketing. You can track impressions, clicks and engagement, split by team or region, quantifying exposure that used to be invisible. It shifts email signatures from set-and-forget to an always-on, measurable marketing channel.”
Minimum sends per variant
At 95% confidence, 80% power, and 20% relative minimum detectable effect.
Baseline CTR | Minimum sends per variant |
|---|---|
1% | ~11,000 |
2% | ~5,500 |
5% | ~2,200 |
10% | ~1,100 |
Formula: two-proportion z-test (α = 0.05, power = 0.80). Source: Evan Miller's Sample Size Calculator. Values are approximate — run your actual baseline CTR through a significance calculator to confirm.
Use rotation when you want to serve multiple messages to the same audience over time without running a formal comparison.
Use a group split when you need a statistically clean, isolated comparison between two specific variants.
Events and awards banners: a worked example
Scenario: A 600-person company is sponsoring an industry awards evening six weeks out and wants to use employee email signatures to drive registrations.
Banner spec:
Dimensions: 600 × 200 px
File size: less than 100 kB
Format: PNG or JPG
Alt text: "Sponsoring the 2026 [Industry] Awards — register now"
Contrast: 4.5:1 minimum on all banner copy
Schedule:
Live: six weeks pre-event, applied to all external-facing senders
Swap to "Thanks for attending" variant: 24 hours post-event
Tracking URL:
utm_source=email-signature&utm_medium=banner&utm_campaign=2026-awards
Report attributed registrations via this UTM source in Google Analytics or your marketing platform.
All numbers in this example are illustrative.
How to target email signature campaigns effectively
Email signature campaign targeting allows you to show different messages to different users or audiences based on attributes like role, department, or location. More precise targeting improves relevance, which typically leads to better engagement.
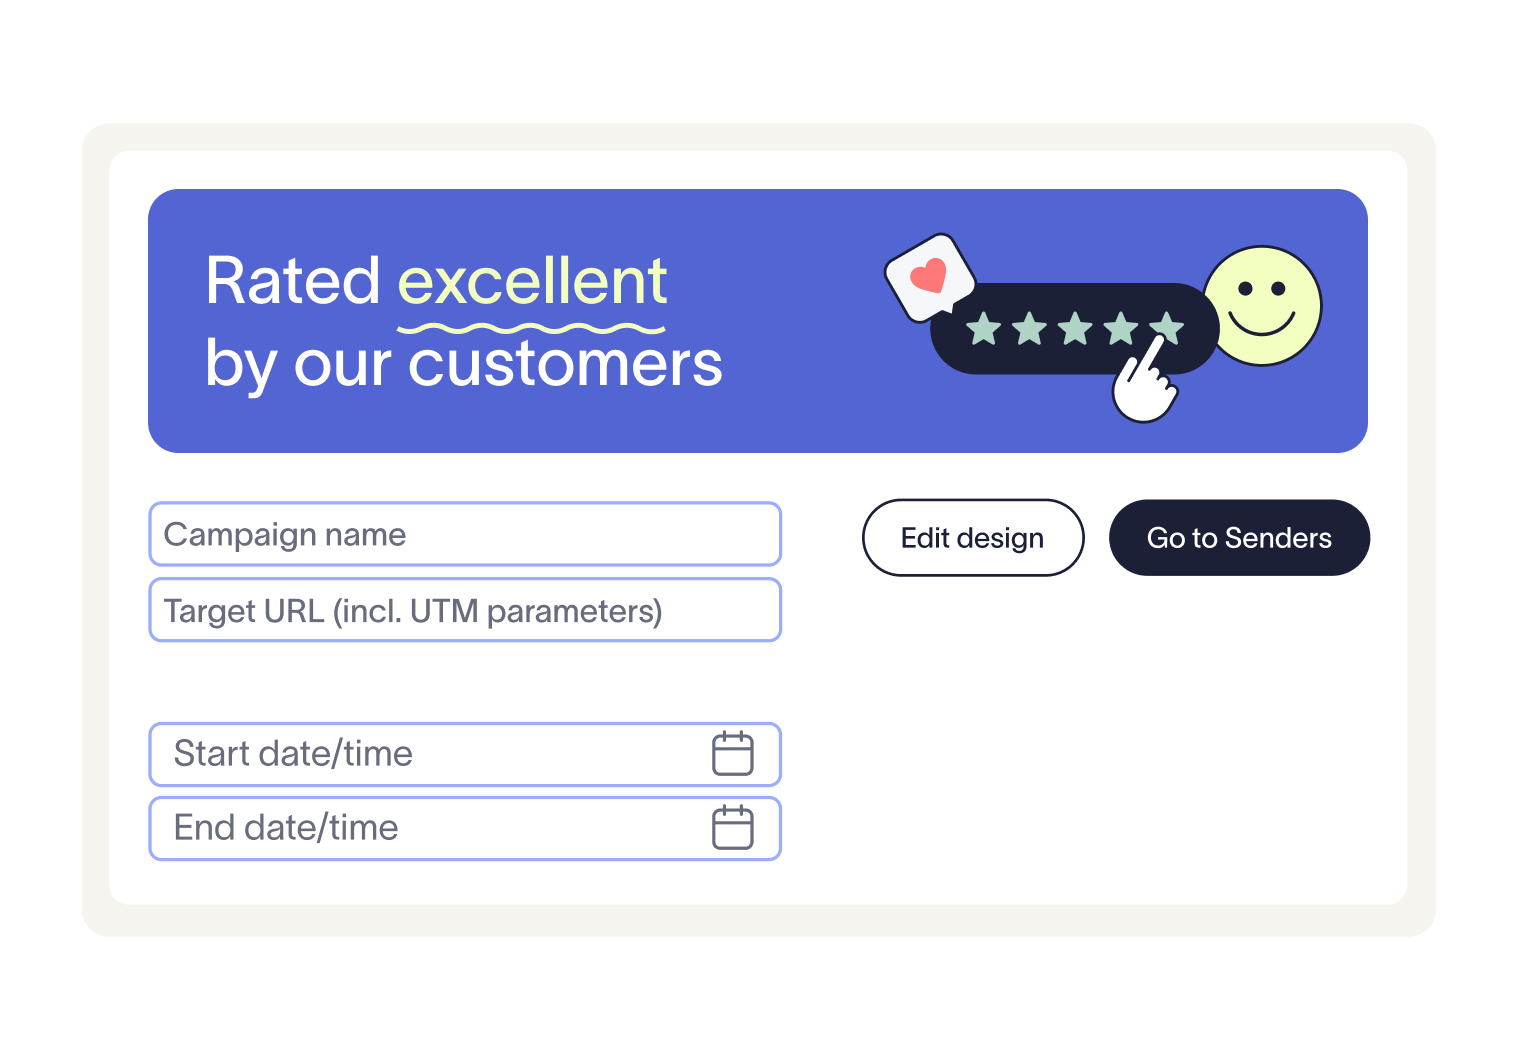 Exclaimer uses Signature Rules to assign campaigns based on user attributes from your directory. Directory Sync pulls those attributes directly from Microsoft 365 (via Microsoft Entra ID) or Google Workspace, so targeting rules apply automatically without manual list management.
You can target campaigns in several ways:
By department or role. Align campaigns with how teams communicate. For example, sales teams can promote events or demos to prospects, while customer success teams can share onboarding resources or upsell content with existing customers.
By location or region. Run localized campaigns based on geography. This is useful for region-specific events, offers, or compliance messaging where content needs to vary by country or office.
By customer lifecycle stage. Tailor messaging depending on whether the recipient is a prospect, new customer, or long-term client. This keeps campaigns relevant to where the relationship currently sits.
By running multiple campaigns across different groups. Different user groups can carry different campaigns at the same time. This allows you to support multiple initiatives without overloading a single audience with competing messages.
“You can apply this to the emails going out to deals already in your pipeline, nurturing deals that are already warm. That can be far more effective than worrying about the top of the funnel, and email signatures can be tremendously effective at simply increasing the percentage of deals you win.”
How to manage campaigns without adding IT overhead
Managing email signature campaigns at scale requires centralized control, clear ownership, and minimal manual intervention. Without this, updates become inconsistent and IT teams end up handling repetitive requests.
 To keep campaigns efficient and low-maintenance:
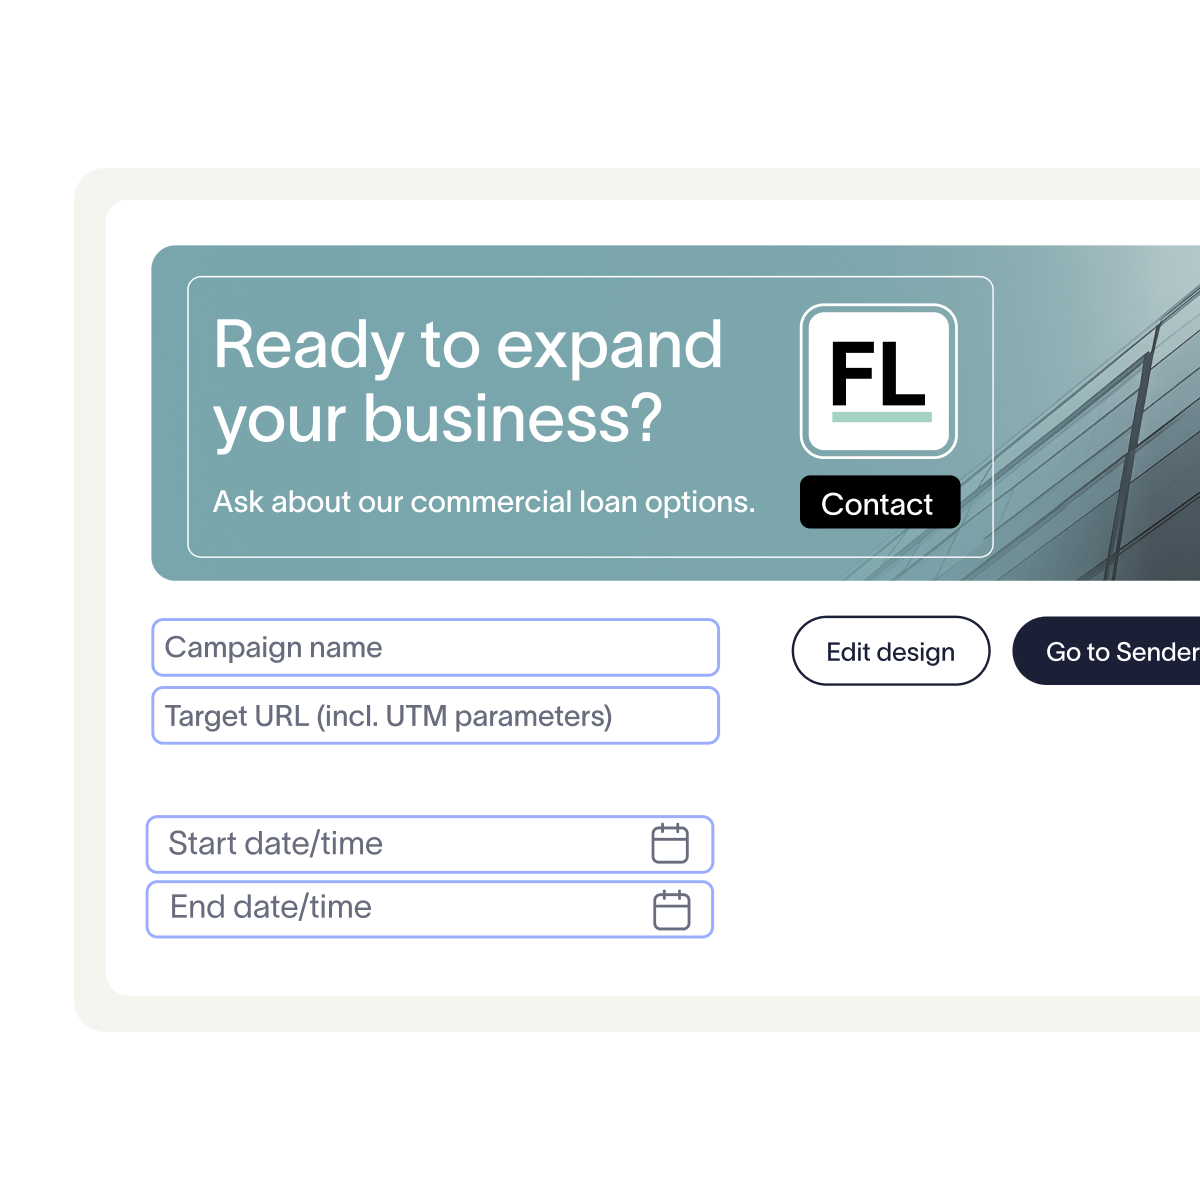
Centralize control across all signatures. Manage campaigns from a single platform rather than relying on individual users. This allows you to update banners, messaging, and rules once and apply changes instantly across the organization.
Let marketing update campaigns without IT involvement. Make sure marketing teams can update their own campaign content — such as banners and links — while IT maintains control over structure and permissions. This reduces support tickets and speeds up campaign execution.
Maintain consistent branding and compliance. Use controlled templates and centralized rules to keep logos, disclaimers, and formatting consistent. This avoids errors and reduces the risk of non-compliant or outdated signatures being sent.
“Role-based permissioning lets marketing control the creative while IT keeps governance, security and the top-down view behind the scenes. Marketing can put a campaign live without raising an IT ticket, and IT handles directory sync and the technical side.”
How to optimize and improve your campaigns
Optimizing email signature campaigns involves monitoring performance, refreshing content, and adjusting messaging over time. This helps maintain engagement and relevance.
Optimization cadence:
Review clicks and CTR weekly for the first four weeks after launch
Refresh banner creative every three to six weeks, or when CTR drops materially from your opening baseline
A/B test one variable at a time — CTA wording, banner creative, or landing page. See the A/B testing section above for minimum send volumes and run windows
Keep one primary CTA per banner and pause campaigns as soon as the offer or event expires
Monitor clicks and engagement. Track campaign performance using UTM-tagged URLs in Google Analytics, your CRM, or Exclaimer's built-in analytics. Measure clicks, CTR, conversion rate, and pipeline influence. Define what a material CTR decline looks like before the campaign launches so you have a clear trigger for creative refresh.
Refresh banners regularly. Email signatures are seen repeatedly, so static content loses impact over time. Updating visuals and messaging every three to six weeks keeps campaigns relevant and prevents fatigue.
Test different messaging and CTAs. Test one variable at a time using the group-split method for statistically clean results.
Use scheduling to keep campaigns aligned with priorities. Plan campaigns around key dates such as events or launches. Scheduling makes sure the right message appears at the right time without requiring manual updates.
Best practices checklist |
|
Common mistakes to avoid
Most email signature campaign issues come down to poor planning, lack of targeting, or inconsistent execution. Avoiding these common mistakes helps maintain campaign performance and prevents unnecessary rework.
Avoid overloading banners with too much content. Trying to include multiple messages, links, or CTAs reduces clarity. Keep each banner focused on a single objective so recipients immediately understand what action to take.
Avoid poor placement that disrupts the email flow. Banners that feel intrusive can reduce engagement or distract from the email itself. Placement should balance visibility with readability, especially in ongoing conversations.
Avoid using the same message for every audience. A generic campaign sent across all teams often underperforms. Tailor messaging based on department, role, or audience type to improve relevance.
Avoid running campaigns without defined timing. Leaving banners active indefinitely can lead to outdated promotions being sent. Always set clear start and end dates to keep messaging accurate and timely.
Avoid skipping testing before deployment. This can lead to broken links, formatting issues, or poor rendering across devices. Always preview campaigns before rolling them out.
Prevent inconsistent branding by using centralized control. Without it, signatures can vary across users and devices, weakening brand consistency and creating compliance risks.
Final thought
Email signature campaigns scale with your organization’s communication. Once set up, they run continuously across every email, making them a practical way to extend campaign reach without increasing workload.
 Ready to see how this works in practice? Try creating a campaign in Exclaimer today, or book a demo to explore targeting, scheduling, and centralized control in more detail.